Settings & RBAC
The Settings page is where workspace administrators control system-wide defaults, configure role-based access control (RBAC), and manage workspace-level behavior.
Navigate to Settings in the sidebar.
Account Defaults
Section titled “Account Defaults”| Setting | Description |
|---|---|
| Default Password | The default password assigned to new user accounts created via the dashboard or bulk import |
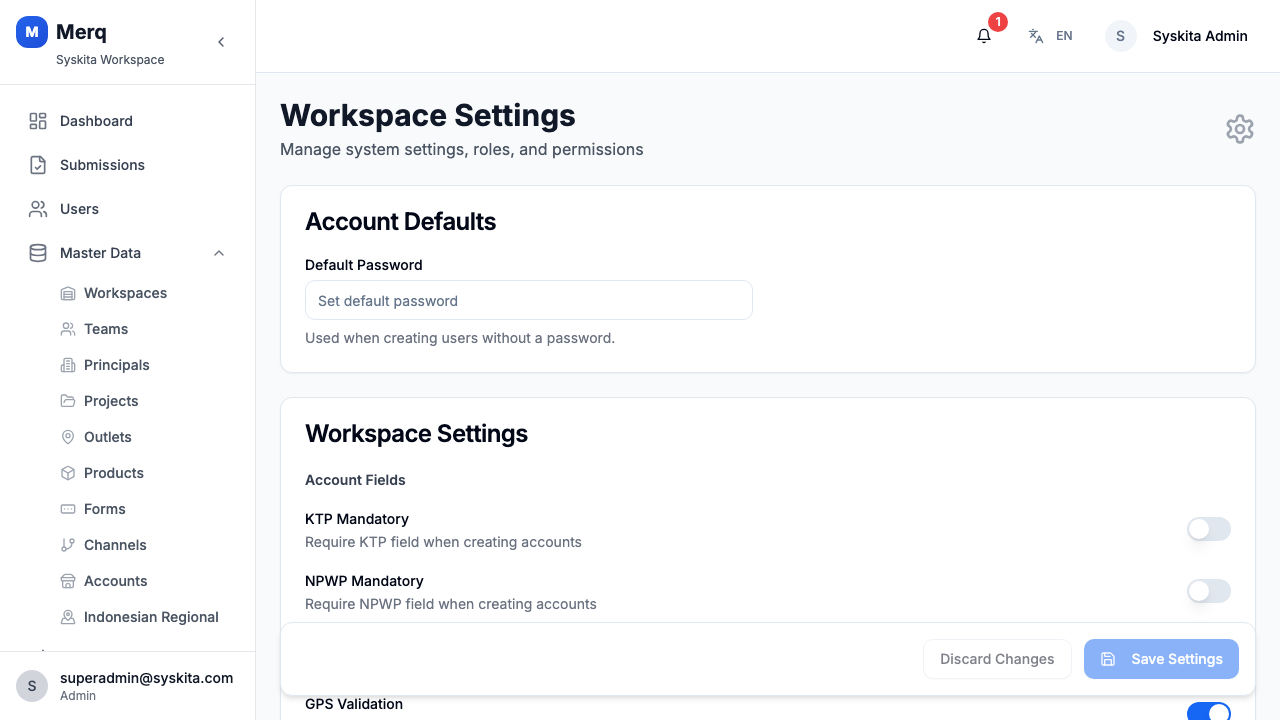
Workspace Settings
Section titled “Workspace Settings”These settings control field operations behavior for the entire workspace:
| Setting | Description |
|---|---|
| KTP Mandatory | Require employees to have a national ID (KTP) on file |
| NPWP Mandatory | Require employees to have a tax ID (NPWP) on file |
| GPS Validation | Enforce GPS location verification during check-in |
| Default Outlet Radius | Default geofence radius (in meters) for outlet check-ins |
| Custom Session Expiry | Override the default JWT session expiry duration |
| Multiple Barcode per Product | Allow a single product to have more than one barcode |
Click Save after making changes to workspace settings.
Permissions Tab
Section titled “Permissions Tab”The Permissions tab lists all permissions available in the system, organized by module.
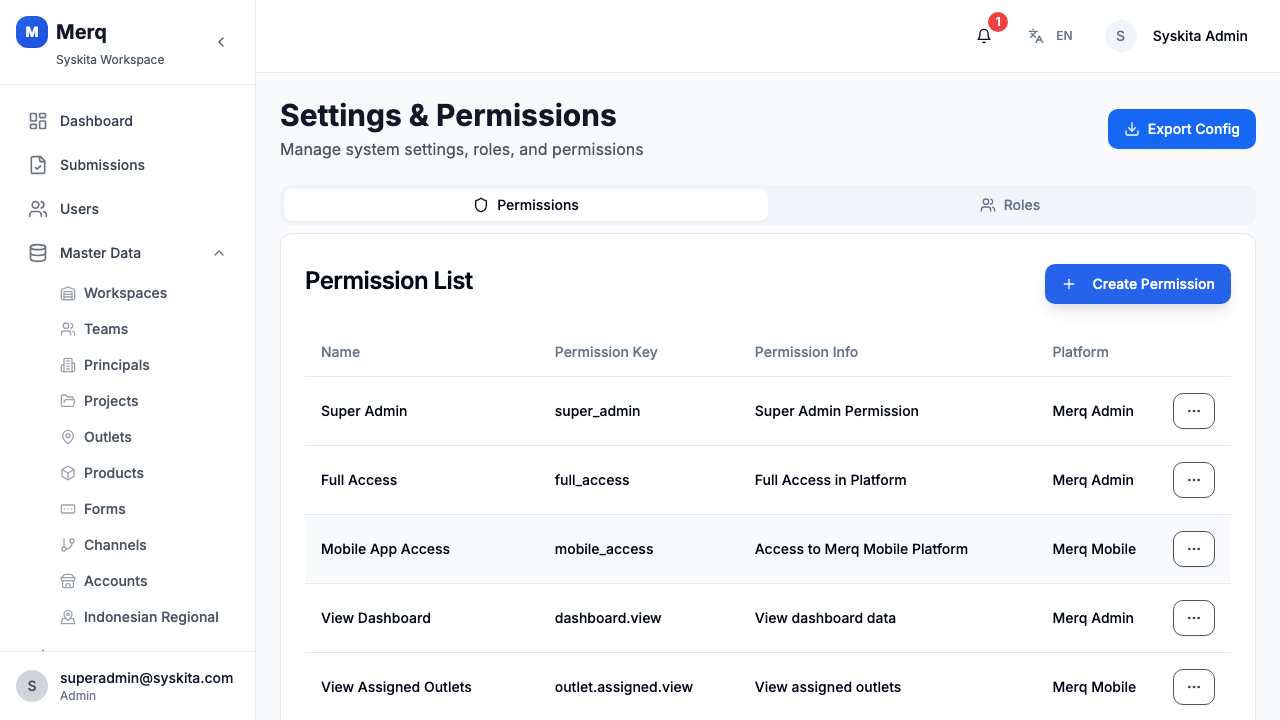
Each permission has:
- Key — machine-readable identifier (e.g.,
visit.manage,submission.approve) - Name — human-readable label
- Platform — Web (office) or Mobile (app)
- Access Level — what the permission grants (read, create, manage, etc.)
Permissions are assigned to roles, not directly to users. To grant a user a permission, assign them to a role that includes that permission.
Roles Tab
Section titled “Roles Tab”The Roles tab lists all roles in the workspace and lets you manage which permissions each role has.
Default Roles
Section titled “Default Roles”| Role | Description |
|---|---|
| Super Admin | Full access to everything; bypasses all permission checks |
| Admin | Full access within the workspace |
| Manager | Manages teams and operations, views reports |
| Supervisor | Manages a team’s daily activities |
| Frontliner | Field staff with mobile app access |
| Approver | Reviews and approves attendance and submissions |
Creating a Custom Role
Section titled “Creating a Custom Role”- Click Add Role
- Enter a Role Name
- Click Save
- Open the new role and assign permissions from the permissions list
Editing Role Permissions
Section titled “Editing Role Permissions”- Click a role to open its detail
- Toggle individual permissions on/off
- Changes are saved immediately
Permission Categories
Section titled “Permission Categories”Permissions are grouped by module. Common examples:
| Permission Key | Description |
|---|---|
visit.manage | Create, edit, delete visits |
submission.create | Submit forms during visits |
submission.approve | Approve or reject submissions |
submission.manage | Full submission management |
outlet.manage | Create and edit outlets |
user.manage | Create and manage user accounts |
attendance.manage | Manage attendance records |
docs.view | Access the Technical Documentation |
Export Config
Section titled “Export Config”Click Export Config to download the full workspace configuration (roles, permissions, workspace settings) as a JSON file. Useful for backup or auditing.