HR Center
The HR Center consolidates HR-related operations: tracking attendance records, approving attendance submissions, and managing employee information.
Accessing HR Center
Section titled “Accessing HR Center”Navigate to HR Center in the sidebar. Access is gated by role:
| Role | Access Level |
|---|---|
| Super Admin / Admin | Full management access (approve, edit, delete) |
| Manager | View access to team attendance and records |
| Approver | Read-only access to pending approvals |
Summary Cards
Section titled “Summary Cards”At the top of the HR Center, three summary cards display:
| Card | Description |
|---|---|
| Total Employees | Total active employees in the workspace |
| Attendance Records | Total attendance records in the current period |
| Pending Approvals | Number of attendance submissions awaiting approval |
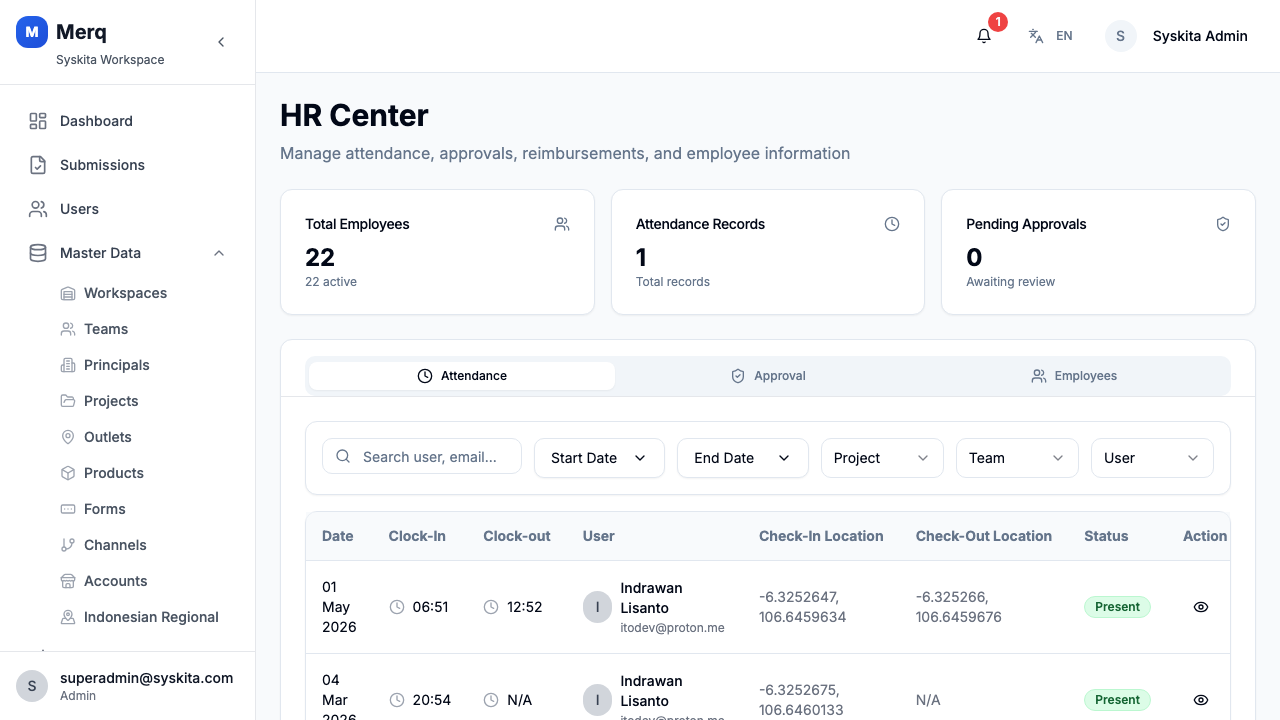
Attendance Tab
Section titled “Attendance Tab”The Attendance tab lists all attendance records for the workspace.
Each record shows:
- Employee name
- Date
- Check-in time and photo
- Check-out time
- Location (GPS coordinates)
- Duration
- Status (Approved / Rejected / Pending)
Filtering Attendance
Section titled “Filtering Attendance”Filter by date range, employee, team, or status.
Attendance Detail
Section titled “Attendance Detail”Click a record to open the full attendance detail, including the check-in selfie photo and GPS location on a mini-map.
Approval Tab
Section titled “Approval Tab”The Approval tab lists all attendance submissions currently Pending review.
For each pending record you can:
- Approve — mark the attendance as valid
- Reject — reject with a reason
Approving or rejecting an attendance record updates the status immediately and notifies the frontliner.
Employees Tab
Section titled “Employees Tab”The Employees tab lists all user accounts in the workspace with their employment details.
Columns include: name, employee code, position, join date, employment status, KTP (national ID) status, NPWP (tax ID) status, and actions.
From this tab you can:
- Add Employee — Click the Add Employee button (top-right)
- Edit Employee — Click the Edit action in the row’s dropdown menu
- Deactivate Accounts — Click the Deactivate action (requires admin role)
- Filter by Status — Use the status filter to show Active/Inactive employees
Employee Status Badge
Section titled “Employee Status Badge”Some employees may show an orange “Needs completion” badge. This indicates:
- The employee was auto-created when a user account was created
- Essential employment details are missing (employee code, join date, or KTP)
- The record should be completed with full HR information
Managing Employees
Section titled “Managing Employees”Adding an Employee
Section titled “Adding an Employee”- Click Add Employee (top-right corner)
- Fill in the employee form:
Basic Information
Section titled “Basic Information”| Field | Required | Description |
|---|---|---|
| User | Yes | Link to existing user account |
| Employee Name | Yes | Auto-filled from user profile |
| Employee Code | Recommended | Unique identifier (e.g., EMP-001) |
Contact & Identity
Section titled “Contact & Identity”| Field | Required | Description |
|---|---|---|
| KTP No | Conditional | National ID number (required if KTP mandatory in settings) |
| NPWP No | Conditional | Tax ID number (required if NPWP mandatory in settings) |
| Personal Phone | No | Personal contact number |
| Business Phone | No | Work contact number |
Address
Section titled “Address”| Field | Required | Description |
|---|---|---|
| Province | No | Select from dropdown (Indonesian provinces) |
| City / Kabupaten | No | Select from dropdown (filters by province) |
| Address Line | No | Street address details |
| Postal Code | No | Postal/ZIP code |
Note: Province and City use cascading dropdowns — select Province first, then City options will load.
Employment Details
Section titled “Employment Details”| Field | Required | Description |
|---|---|---|
| Date Joined | Recommended | First day of employment (use date picker) |
| Date Left | No | Last day of employment (for inactive employees) |
| Notes | No | Additional employment notes |
Banking Information
Section titled “Banking Information”| Field | Required | Description |
|---|---|---|
| Bank Name | No | Employee’s bank |
| Account Name | No | Name on bank account |
| Account No | No | Bank account number |
Emergency Contact
Section titled “Emergency Contact”| Field | Required | Description |
|---|---|---|
| Contact Name | No | Emergency contact person |
| Relation | No | Relationship to employee |
| Contact Phone | No | Emergency contact number |
- Click Save to create the employee record
Editing an Employee
Section titled “Editing an Employee”- In the Employees tab, find the employee row
- Click the dropdown menu (⋮) in the Actions column
- Select Edit
- The same form opens with pre-filled values
- Make changes and click Save
KTP/NPWP Mandatory Toggle
Section titled “KTP/NPWP Mandatory Toggle”Workspace admins can configure whether KTP and NPWP are mandatory for all employees:
- Navigate to Settings → Workspace Settings
- Find HR Settings section
- Toggle KTP Mandatory and/or NPWP Mandatory
- Click Save
When enabled:
- KTP/NPWP fields show a red asterisk (*) in the form
- Validation prevents saving without these fields
- Existing employees are not affected (only new/edited records)
- KTP and NPWP mandatory validation can be configured in Workspace Settings.
- Attendance records created via the mobile app’s Attendance feature appear here automatically.
- When a new user is created with mobile app access, an employee stub is automatically created so they appear in the HR employees list. These stubs show a “Needs completion” badge until full employment details are added.